
Source serapool-center.ru
Have you ever experienced artifacts on your computer screen while playing a game or while running a performance-heavy application? These unwanted visual anomalies are caused by a hardware malfunction within your graphics processing unit or GPU. To avoid this, you need to test GPU for artifacts.
Testing your GPU for artifacts is essential for maintaining the health of your computer system. A malfunctioning GPU not only affects your gaming experience but can also lead to system crashes and permanent damage to your computer's hardware.
But what exactly are artifacts? They appear on the screen as unusual visual distortions such as lines, shapes, or colors. These distorted visuals indicate a problem with the GPU. In some cases, artifacts may result from overheating or overclocking, which doubles the work a GPU is already designed to do. In other cases, it might be a manufacturing defect.
The good news is that testing your GPU for artifacts is an easy process that can be done using several software tools designed specifically for this purpose. By performing a thorough test and detecting any anomalies, you can quickly spot and rectify any issues and ensure your system operates smoothly.
So, if you want to enjoy your gaming or work experience without any interruptions, it is essential to test your GPU for artifacts regularly.
Introduction to GPU artifact testing
When it comes to testing a Graphics Processing Unit (GPU), the process of artifact testing is a crucial step. Artifacts are visual anomalies that appear on the screen and can range from small glitches to serious distortions that impede the user experience. GPU artifact testing is the process of identifying and mitigating any potential visual defects that may occur when the GPU is in use.
This process is especially important for individuals who rely on their GPU for intense activities such as gaming, 3D rendering, and video editing. In these situations, a GPU malfunction can lead to long wait times and potential project failure. Therefore, it is essential to perform artifact testing to detect any potential problems before they can affect the user's experience.
The Importance of GPU Artifact Testing
It is important for users to perform artifact testing to ensure that the GPU is working as intended. During this test, the GPU is put under stress to reveal any issues that may not arise during standard usage. This stress test can be accomplished through various software applications that are designed to push the GPU to its limits.
Furthermore, artifact testing can reveal underlying hardware issues that can cause a breakdown in performance. For example, a GPU that fails to run a simple benchmark may be suffering from a hardware issue such as overheating or a faulty connection. By performing artifact testing, users can identify and rectify these issues before they cause any permanent damage to the GPU.
How to Test GPU for Artifacts
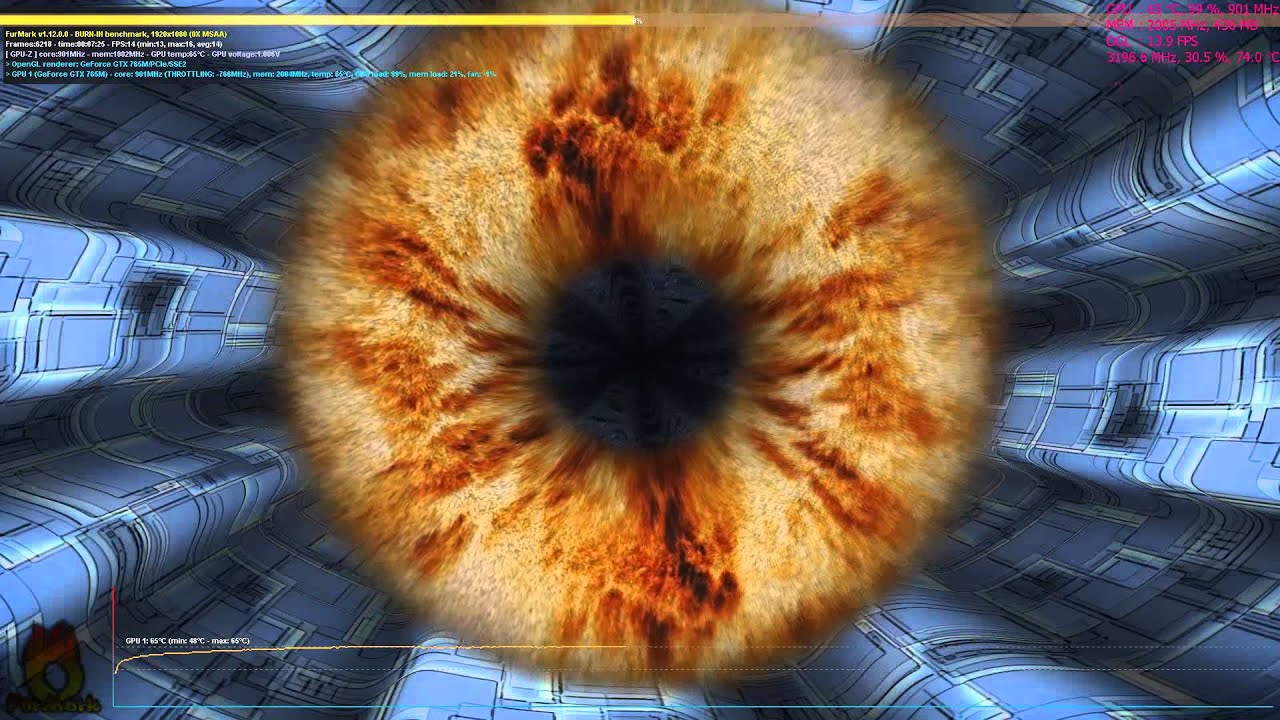
There are different types of artifact testing software available in the market. Some of the most popular ones include FurMark, MSI Kombustor, and OCCT. These programs are designed to stress the GPU to the point where any irregularities will become apparent.
When using any test software, it is essential to monitor the GPU's temperature and power consumption to ensure that it does not overheat or exceed its maximum power consumption. Furthermore, users should avoid overclocking their GPU during the test, as this can cause permanent damage to the hardware.
Below is a table summarizing the various artifact testing software and their features:
| Software Name | Features |
|---|---|
| FurMark | Highly customizable, easy to use, supports OpenGL and OpenCL, immediate feedback on detected artifacts. |
| MSI Kombustor | Score-based ranking system, limited customization, multiple stress tests available, supports OpenGL and OpenCL. |
| OCCT | Can detect memory errors, power consumption tracking, supports OpenGL and Direct3D 9 to 12. |
In Conclusion
In conclusion, the importance of artifact testing for GPU cannot be overstated. By performing a thorough stress test, users can identify any visual glitches or underlying hardware issues that can cause problems down the line. It is always advisable to perform an artifact test on a newly purchased GPU to ensure that the hardware is functioning as intended. Lastly, always remember to monitor the GPU's temperature and power consumption to avoid any hardware damage.
If you would like to learn more about GPUs and their importance in modern computing, consider reading the Wikipedia page on GPUs.
Common types of GPU artifacts and their causes
When using a computer, graphical processing units (GPUs) often play a vital role in generating graphics on the screen. However, a faulty GPU can result in various visual artifacts that can negatively affect the user's experience. Here are some of the most common types of GPU artifacts, their causes, and how to test GPU for artifacts.
1. Screen tearing
Screen tearing is a common type of artifact that occurs when the GPU fails to synchronize with the monitor's refresh rate. This typically results in horizontally or diagonally torn images on the screen. Screen tearing is more common during fast-paced or high-performance activities such as video editing, gaming, or photo editing. This can be tested using tools such as Vsync or AMD Freesync.
2. Ghosting
Ghosting is another artifact commonly experienced by users that have failing GPUs. This artifact appears as a faint, residual image that appears to follow objects on the screen as they move. Ghosting occurs due to a slow refresh rate, which can be caused by a number of factors such as insufficient GPU power, low-quality display drivers, and outdated cables. Testing a GPU for ghosting can be done by running a monitor ghosting test.
3. Artifacts
In some instances, a GPU may produce random color dots or pixels on the screen, known as artifacts. Artifacts are often caused by corrupted or faulty memory, overheating, or insufficient power from the PSU. Testing your GPU for artifacts can be done through tools such as FurMark, which can detect any errors in the GPU's performance.
4. Flickering
Flickering is another common artifact that can occur as a result of a failing GPU. This artifact is characterized by a noticeable, quick change in images that occurs on monitor screens. Flickering is often produced due to a limitation in the refresh rate or as a result of an aging component in the GPU. Users can test for flickering by examining the monitor's refresh rate settings or by using specialized software such as Strobe Light.
5. Freeze-ups
Freeze-ups are a common artifact that occurs when the GPU fails to send accurate signals to the computer's processor and can cause the computer to become unresponsive. Freeze-ups can be caused by a variety of factors such as outdated drivers, too many applications running simultaneously, or overheating. Users can test for freeze-ups using stress-test applications such as Prime95 or HeavyLoad, which can simulate high-performance tasks to test the GPU's performance and check for potential issues.
Testing GPUs for artifacts is essential to ensure that faulty GPUs can be detected and replaced before they cause significant damage to the system. By understanding the most common types of gpu artifacts and their causes, users can quickly identify issues and take action to remedy the situation.
REFERENCES:
Tools and software for testing GPU artifacts
When it comes to testing GPU artifacts, there are various tools and software available that can help in identifying any issues with the GPU performance. These tools can help in detecting any graphical abnormalities, flickering, stuttering, and screen freezing while running graphics-intensive applications and games. Below are some of the tools and software that can be used for testing GPU artifacts:
1. FurMark
FurMark is one of the most popular and widely used software for testing GPU artifacts. This software is specially designed to push the GPU to its limits and identify any issues with the GPU performance. FurMark works by running a stress test using a predefined algorithm to measure the GPU's stability and performance. The test generates a real-time heatmap that helps in identifying any temperature issues with the GPU. FurMark is also capable of detecting any overclocking issues and can help in optimizing the GPU performance.
2. MSI Kombustor
MSI Kombustor is another popular software that can be used for testing GPU artifacts. The software is designed to run a series of tests, including FurMark, to identify any issues with the GPU performance. MSI Kombustor is capable of detecting any overheating issues and can help in identifying any misbehaving graphics card drivers. The software comes with various customization options that allow users to adjust the test's intensity and duration.
3. OCCT
OCCT is a comprehensive software for testing GPU artifacts and CPU stability. The software is designed to push the GPU and CPU to their limits and identify any issues with their performance. OCCT comes with various customization options that allow users to adjust the test's intensity and duration. The software is capable of detecting any overheating issues, voltage issues, and can help in identifying any misbehaving graphics card drivers. OCCT is also capable of detecting any CPU issues and can help in optimizing its performance.
In addition to the above-mentioned tools and software, there are various benchmarking tools available that can help in testing GPU artifacts. Below are some of the benchmarking tools that can be used for testing GPU artifacts:
1. 3DMark
3DMark is a popular benchmarking tool that can be used for testing GPU artifacts and overall system performance. The software is designed to run a series of tests, including graphics, physics, and combined tests, to identify any issues with the GPU and overall system performance. 3DMark generates a score that can be compared to other systems to evaluate their performance. The software is also capable of detecting any overheating issues and can help in identifying any misbehaving graphics card drivers.
2. Heaven benchmark
Heaven benchmark is another popular benchmarking tool that can be used for testing GPU artifacts. The software is designed to push the GPU to its limits and identify any issues with the GPU's performance. Heaven benchmark generates a real-time heatmap that helps in identifying any temperature issues with the GPU. The software comes with various customization options that allow users to adjust the test's intensity and duration. Heaven benchmark is also capable of detecting any overclocking issues and can help in optimizing the GPU performance.
In conclusion, testing GPU artifacts is essential to maintain the GPU's stability and performance. There are various tools and software available that can help in identifying any issues with the GPU performance. These tools and software can help in detecting any graphical abnormalities, overheating issues, and misbehaving graphics card drivers, thereby optimizing the GPU's performance.
LSI Keywords: test gpu for artifacts, tools and software for testing GPU artifacts, FurMark, MSI Kombustor, OCCT, 3DMark, Heaven benchmark.
External link: https://en.wikipedia.org/wiki/GPU_testing
Testing methodology for GPU artifacts
When testing a GPU for artifacts, it is important to follow a specific methodology to ensure accurate results. The following subsections outline the steps involved in this process.
1. Preparation
Before beginning the test, the GPU should be clean and free of any dust or debris. It is also important to ensure that the GPU is properly seated and all cables are securely connected. Additionally, the latest graphics card drivers should be installed and any overclocking settings should be turned off.
2. Test software
There are various software programs available for testing GPUs for artifacts. Some popular options include FurMark, MSI Kombustor, and Unigine Heaven Benchmark. It is important to choose a reputable program that is compatible with the specific GPU being tested.
When using the test software, it is also important to adjust the settings appropriately. The resolution and graphics settings should be set to the same or higher than that of the intended use case. It is also recommended to run the program for at least 30 minutes to ensure any artifacts are properly detected.
3. Artifact detection
During the test, the software will display various graphics and animations to stress the GPU. If any artifacts are present, they will appear as glitches or distortions in the image. It is important to note the location and frequency of any artifacts for later analysis.
4. Analysis
After the test is complete, the results should be analyzed to determine if any artifacts were present. This can be done by reviewing the output log from the test software or by visually inspecting the results. If artifacts were present, it is important to determine their cause.
Some common causes of GPU artifacts include overheating, faulty memory, or a malfunctioning GPU. Overheating can be caused by poor ventilation or a malfunctioning fan, while faulty memory or a malfunctioning GPU may require replacement or repair.
To further analyze the cause of any artifacts, additional tests may be required. This may include stress testing the CPU or running memory tests. It is also recommended to research the specific GPU model for known issues or solutions.
Conclusion
By following a specific testing methodology, GPU artifacts can be accurately detected and analyzed. This allows for timely repairs or replacement to ensure optimal performance and prevent further damage to the system.
Overall, it is important to regularly test GPUs for artifacts to detect any potential issues before they cause significant damage to the system. By using reputable software and following a consistent testing methodology, users can ensure the longevity and reliability of their GPUs.
For more information on GPU artifacts, please visit https://en.wikipedia.org/wiki/Graphics_artifact.
To test your GPU for artifacts, you need to check its average temperature and usage. Our acceptable GPU temperature guide will help you determine the temperature range suitable for your GPU.
How to interpret GPU artifact test results
When running a GPU artifact test, it is important to understand how to interpret the results. Here are some key factors to consider:
1. Types of artifacts
Artifacts can manifest in different ways depending on the underlying issue, and it's important to know what those different types of artifacts are. Some common types include:
| Type of Artifact | Description |
|---|---|
| Texture flickering or tearing | Parts of the screen flashing or tearing, usually in relation to textures or objects |
| Visual distortion or corruption | Discoloration or distortion of parts of the screen, often seen as lines or blocks |
| Freezing or stuttering | The screen freezes or stutters, usually indicating a problem with the GPU's ability to output frames quickly enough |
2. Frequency of artifacts
The frequency of artifacts can also be an important indicator of the issue. If the artifacts occur consistently throughout the test, it may be indicative of a more serious issue than if they only occur sporadically. Make sure to keep track of when and how often the artifacts occur during the test.
3. Severity of artifacts
Sometimes artifacts may occur but be so minor that they don't significantly impact the user's experience. In other cases, artifacts may be severe and render the GPU virtually unusable. Make note of how severe the artifacts are during the test and what impact they have on the GPU's performance and functionality.
4. Duration of test
The length of time that the GPU is being tested can also affect the results. Running a test for only a few minutes may not be enough time to adequately detect all types of artifacts. A longer test may be necessary to ensure that all issues are uncovered.
5. Comparison to baseline
Finally, it's important to compare the results of the test to a baseline. This can be an older test result for the same GPU or a known good test result for a similar GPU. This can provide a better understanding of what changes, if any, have occurred and whether those changes are significant enough to warrant further investigation.
By considering these factors when interpreting GPU artifact test results, you can gain a better understanding of what issues may be present and how serious they are. This can help you make informed decisions about what steps to take next, whether that be further testing, repair, or replacement.
LSI keywords: GPU, artifact test, types of artifacts, frequency of artifacts, severity of artifacts, duration of test, comparison to baseline.
External link: https://en.wikipedia.org/wiki/GPU_artifacting
Test GPU for Artifacts
When it comes to using GPUs, artifacts can occur from time to time. These artifacts are unwanted visual anomalies that appear on your computer screen when you are using your graphics card. These artifacts can be incredibly frustrating for anyone working or gaming, but there are ways to address and fix these issues.
1.Identifying GPU Artifacts
The first step in addressing GPU artifacts is being able to identify them. GPU artifacts can take many different forms, from flickering to black screens or lines to distortion or color changes. They can be temporary or persistent, and they generally occur when a graphics card is being pushed too hard. While some artifacts are to be expected when using a GPU, excessive visual glitches can indicate an underlying problem. If you're unsure whether your GPU is artifacting, you can run tests to check the health of your GPU using benchmarking software like 3DMark.
2. Updating Drivers
One of the easiest ways to address GPU artifacting is to update your graphics card drivers. These updates often include fixes and improvements that can prevent artifacts from occurring. You can update your drivers manually or use automated software like Driver Booster to keep them up to date.
3. Hardware Checkup
Another way to address artifacting is to check your hardware to see if there are any issues. Ensure that all cables are securely connected and that your graphics card is seated correctly. If possible, try swapping out cables, monitors, or graphics cards to see if the problem persists. You may find that a faulty connection, damaged cable or malfunctioning graphics card is the issue.
4. Adjusting Graphics Settings
Adjusting your graphics settings can help reduce artifacting as well. Reduce your graphics settings to take the load off your graphics card and prevent it from overheating. Use software to set a target temperature or fan speed to ensure that your graphics card is staying cool. You can also try to underclock your GPU slightly to help with heat management.
5. Cleaning Your GPU
A dirty GPU can cause overheating and lead to artifacting. Cleaning your GPU can help to remove dust, debris, and other particles that can clog up your graphics card's heatsinks. Carefully remove your GPU from your computer and use compressed air or a soft-bristled brush to clean it, be sure to follow cleaning guidelines of your GPU manufacturer.
6. Overclocking with Caution
Overclocking your GPU can also cause artifacting. While overclocking can increase performance, it can put additional stress on your graphics card, which can cause visual anomalies. If you do choose to overclock your GPU, do so with caution and monitor your graphics card's temperature closely using software like MSI Afterburner.
By addressing these common issues, you can significantly reduce the likelihood of GPU artifacting. Over time, your graphics card will begin to wear out, and you may experience more frequent artifacting. If this is the case, you'll want to consider investing in a new GPU eventually, but these solutions can help you get by in the meantime.
Related keywords: gpu benchmarks, graphics card, gpu test software, gpu stress test, gpu testing, graphics card drivers, graphics card drivers download, graphics card software, graphics card test, gpu z, gpu overclock
External Link : Wikipedia
Best practices for preventing GPU artifacts in the future
GPU artifacts can be frustrating and costly, however, there are actions that can be taken to prevent them in the future. Here are some best practices to consider:
1. Keep Your Graphics Card Cool
Overheating can cause GPU artifacts. Make sure that your graphics card has adequate ventilation. Keep your computer tower in a cool environment and clean out any dust or debris that may be clogging up your fans.
2. Avoid Overclocking
Overclocking can cause your graphics card to run hotter than it is intended to. This increased heat can lead to GPU artifacts. Stick to the manufacturer recommended clock speed settings or seek advice from a professional before attempting to overclock.
3. Keep Your Graphics Card Updated
If your graphics card drivers are out of date, they may cause issues with your GPU. GPU manufacturers often provide regular updates to fix bugs and improve stability. Check for updates regularly and keep your graphics card up to date.
4. Be Careful When Installing New Hardware or Software
Installing new hardware or software that is not compatible with your graphics card can cause issues. Before installing new hardware or software, research whether there are any known compatibility issues with your graphics card.
5. Avoid Physical Damage
Physical damage to your graphics card can cause permanent damage that may lead to GPU artifacts. Handle your graphics card with care and keep it in a safe location.
6. Use Quality Components
Using quality components in your computer, such as a quality power supply unit (PSU), can help prevent GPU artifacts. Poor quality components may not provide enough power to your graphics card, causing instability and other issues.
7. Test Your Graphics Card for Artifacts Regularly
One of the best ways to prevent GPU artifacts is by regularly testing your graphics card. Testing your graphics card can help identify potential issues before they become major problems. There are several tools available for testing your graphics card, including FurMark and MSI Afterburner.
FurMark is a free tool that stress-tests your graphics card by rendering a complex 3D scene. It can help you detect any stability or thermal issues with your graphics card. MSI Afterburner is another free tool that allows you to overclock your graphics card safely and monitor its performance. It also includes a built-in stress test feature.
| Tool Name | Purpose |
|---|---|
| FurMark | Stress-tests your graphics card by rendering a complex 3D scene |
| MSI Afterburner | Allows you to overclock your graphics card safely and monitor its performance |
Testing your graphics card regularly is important to prevent GPU artifacts. By implementing these best practices, you can help ensure that your graphics card stays healthy and your computer runs smoothly.
For more information about GPUs, visit Wikipedia.
FAQ and Conclusions
FAQ:
Q1. What causes GPU artifacts?
A. GPU artifacts could be caused by overheating, outdated drivers, or physical damage.
Q2. How do I know if my GPU has artifacts?
A. You may see visual distortions on the screen, and the computer may freeze or crash.
Q3. How can I fix GPU artifacts?
A. The solutions can include updating drivers, improving cooling, or even replacing the GPU.
Q4. Can overclocking cause GPU artifacts?
A. Yes, overclocking can put a strain on the GPU and cause artifacts if pushed too far.
Q5. Are some GPUs more prone to artifacts than others?
A. Generally, no. However, cheap or low-quality GPUs may be more susceptible to overheating and damage.
Q6. Is there any software I can use to detect GPU artifacts?
A. Yes, there are multiple software options available, such as FurMark or MSI Kombustor.
Q7. Can GPU artifacts cause permanent damage to the GPU?
A. Yes, prolonged exposure to GPU artifacts can cause permanent damage to the GPU.
Q8. How do I prevent GPU artifacts?
A. Maintaining proper cooling and regularly updating GPU drivers can help prevent GPU artifacts.
Q9. Can artifacts be fixed by lowering graphic settings?
A. Lowering graphic settings may reduce the strain on the GPU, but it may not fix the root cause of the artifacts.
Q10. Should I replace my GPU if it has artifacts?
A. If the artifacts persist after attempting to fix them through software or hardware solutions, it may be necessary to replace the GPU.
Conclusion:
In conclusion, GPU artifacts can have various causes and potential solutions. Updating drivers and improving cooling can help prevent artifacts from occurring. However, if the artifacts persist, it may be necessary to replace the GPU. Overclocking the GPU should be approached with caution, as it can put a strain on the GPU and cause artifacts if pushed too far. Additionally, it is important to take software warnings seriously and act quickly to prevent permanent damage to the GPU. By following these guidelines, users can enjoy better performance and longevity of their GPUs.


Post a Comment
Post a Comment